Art Break at the MFA! Tissue Paper Stained Glass
Art Break at the MFA! Tissue Paper Stained Glass
Have you ever seen stained-glass windows or lamps, and wondered how they were made? Stained-glass windows became popular across Europe during the Gothic Period between 1150 and 1450 when they were commonly used in churches. Later, artists used stained glass to create lamps, which have been beloved objects in homes for over 100 years. But the technique of making colored glass for decorative purposes actually dates back to Ancient Rome!
To make colored glass, artisans add different metals to molten glass. Each metal creates a unique color. For example, copper can be used to make dark reds, and cobalt is used to make bright blues. While the glass is still very hot, around 2,000 degrees Fahrenheit, the artisan will carefully mold it into the desired shape. When the glass pieces cool, they are arranged into their final design and welded together using lead.
In the late 1800s, artists began using stained glass to make lampshades. The artist most commonly associated with these lamps is Louis Comfort Tiffany, an American painter and interior designer who created a studio in New York that specialized in decorative glass and metal objects. Many artists worked in Tiffany’s studio, including one of the top designers, Clara Driscoll.
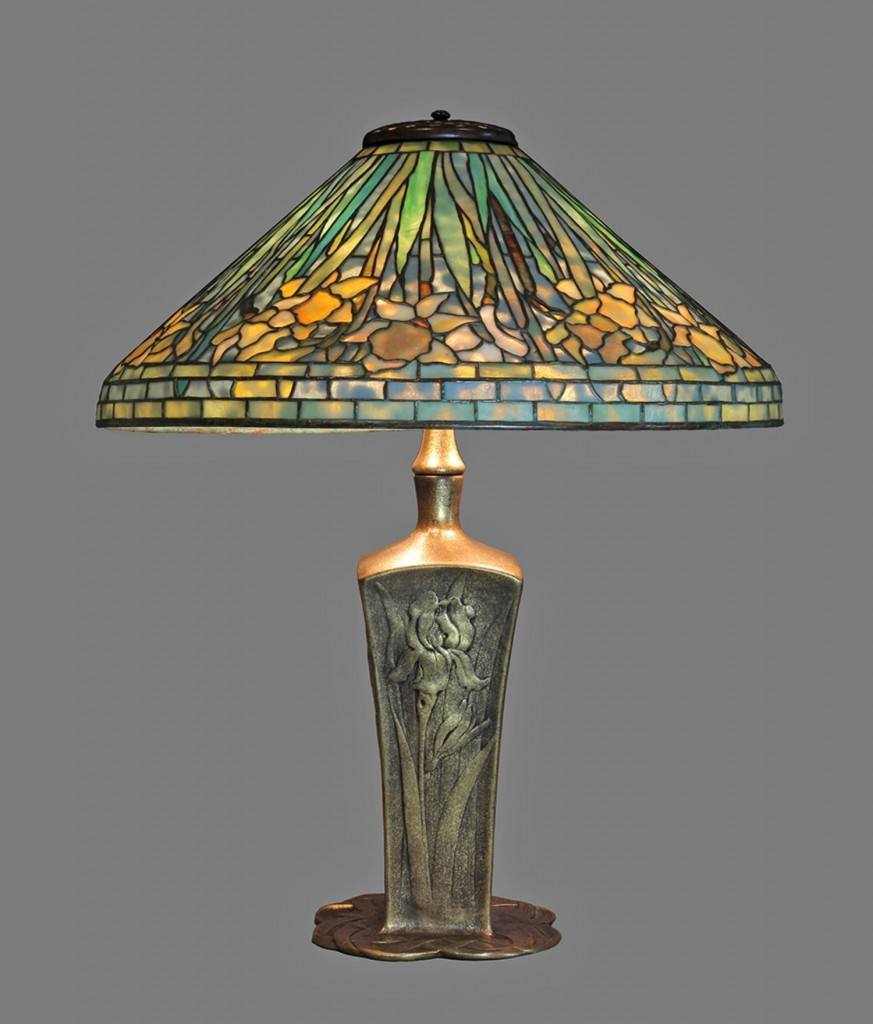
Driscoll was the head of the Women’s Glass Cutting Department, nicknamed “the Tiffany Girls.” She was well known for her designs inspired by nature, including flowers and insects. During her career, she designed over 30 different lamps! In the MFA collection, there is the Daffodil Lamp with Iris Base from Tiffany Studios. It is likely the first work by Driscoll.
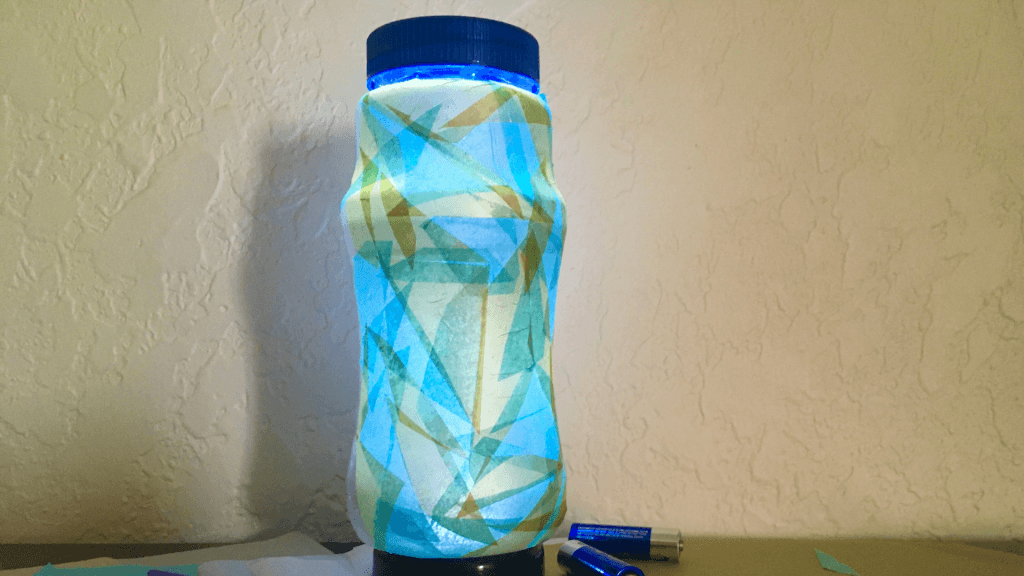
Try making a faux-stained glass lamp at home using tissue paper and recycled materials! Follow the steps below to create your masterpiece. Then, use #MFAfromHome to share your creations with us online!
Materials:
- Tissue paper
- Scissors
- Liquid glue or Modge Podge
- Paintbrush
- Clear plastic or glass container
- Small battery-powered light
Directions:
- Use scissors to cut your tissue paper into various shapes. Cut enough tissue paper shapes to completely cover the surface of your plastic or glass container.
- Use a paintbrush to spread liquid glue or Modge Podge to the outside surface of your container. To avoid making your container too sticky, use small amounts of glue and only apply it to small sections at a time.
- Carefully stick your tissue paper to the wet glue, and use your fingers to smooth out any wrinkles. You can also apply a small amount of glue to the tissue paper to smooth it. Experiment with different patterns and layers.
- Once your container is completely covered, set it aside to dry.
- When your container is fully dried, insert the small battery-powered light inside to see your faux-stained glass design glow!
- Optional: Use a variety of recycled clear containers of different shapes and sizes to create a collection of faux-stained glass lamps, or pick special colors of tissue paper to create decorative lamps for holidays or special occasions!
Image: Tiffany Studios (American, 1878-1933), Daffodil Lamp with Iris Base, 1906, Leaded stained glass and gilt bronze. Gift of Mary Alice McClendon in honor of the Museum’s 50th Anniversary