Tissue Paper Flowers!
Spring is officially here! One symbol of spring today is a beautiful flower, but throughout history, flowers have symbolized many things to many different cultures around the world. In our special exhibition In Full Bloom: Netherlandish Flower Paintings and Trade, we look at what flowers represented to the people of the Netherlands in the 17th and 18th centuries.
These centuries are often referred to as the Dutch “Golden Age,” a period of prosperity, peace, intellectual exploration, and cultural development in an area known as the Low Countries. During this time, new trade routes had been created around the world, and goods that Dutch people had never seen before were being brought to the Netherlands. These goods included Chinese porcelains, East Indian spices, Indian silks, and hundreds of exotic flower species.
These new flowers fascinated the Dutch people. Not only were they beautiful, but they also represented wealth, luxury, and new scientific discovery. Dutch gardeners planted these flowers and sold them in local markets, people collected them for their homes, and artists painted them.
Dutch artists were very thoughtful in choosing which flowers to include in their arrangements. Because each flower had a different meaning, they combined different types of flowers to create a story. Many of the paintings featured in In Full Bloom feature insect-bitten leaves, fallen petals, and flowers that thrive in different seasons. These things all tell the story of the passage of time.
Like the flowers that inspired them, these beautiful paintings decorated people’s homes for centuries to come. Even today, they are displayed in homes and museums around the world!
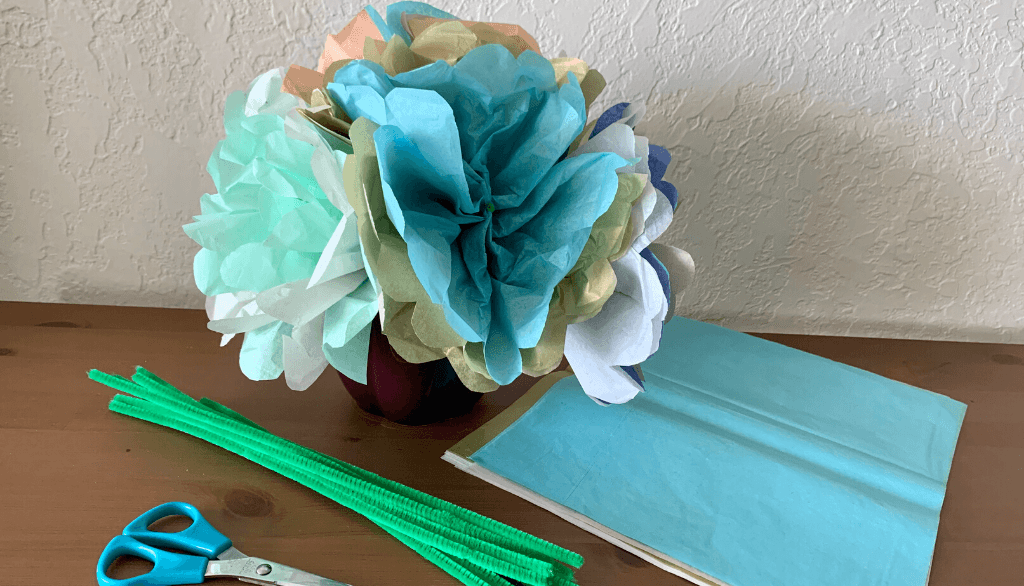
Try creating your own flower displays at home! Follow the steps below to create your beautiful bouquet. Use #MFAfromHome to share your creations with us online!
Materials:
• Tissue paper
• Pipe cleaners or other flexible wire
• Optional: Ruler and pencil
• Optional: Scissors
Directions:
1. Stack three sheets of tissue paper on top of one another, lining them up so their sides are even.
2. Decide how big you want your flowers to be. You may use the full sheets of tissue paper, or use a ruler and pencil to measure smaller rectangles and cut the tissue paper to a different size.
3. Fold the tissue paper as you would a paper fan or accordion. Starting on the short edge of your rectangle, fold all three sheets of tissue paper over about one inch and make a tight crease. Then, flip the stack over and fold it again on the other side. Continue folding and flipping until you reach the end of the tissue paper.
4. Optional: Use scissors to round both ends of your folded tissue paper to create rounded petals.
5. Twist a pipe cleaner or other flexible wire around the center of your folded tissue paper to create a stem. Once it has looped around the tissue paper, twist the stem around itself to hold it in place.
6. Carefully begin opening the folds that you created to form petals. Continue to fluff the pedals until your flower has taken shape.
7. Repeat steps 1-6 until you’ve created a bouquet of flowers.
8. Extra fun: Once you’ve created your flowers, find or create a vase, basket, or other item to display them in. You could recycle and decorate a plastic cup, water bottle, milk carton, or other household item. Once you’ve displayed your flowers, try your hand at making your own Dutch-inspired flower painting!
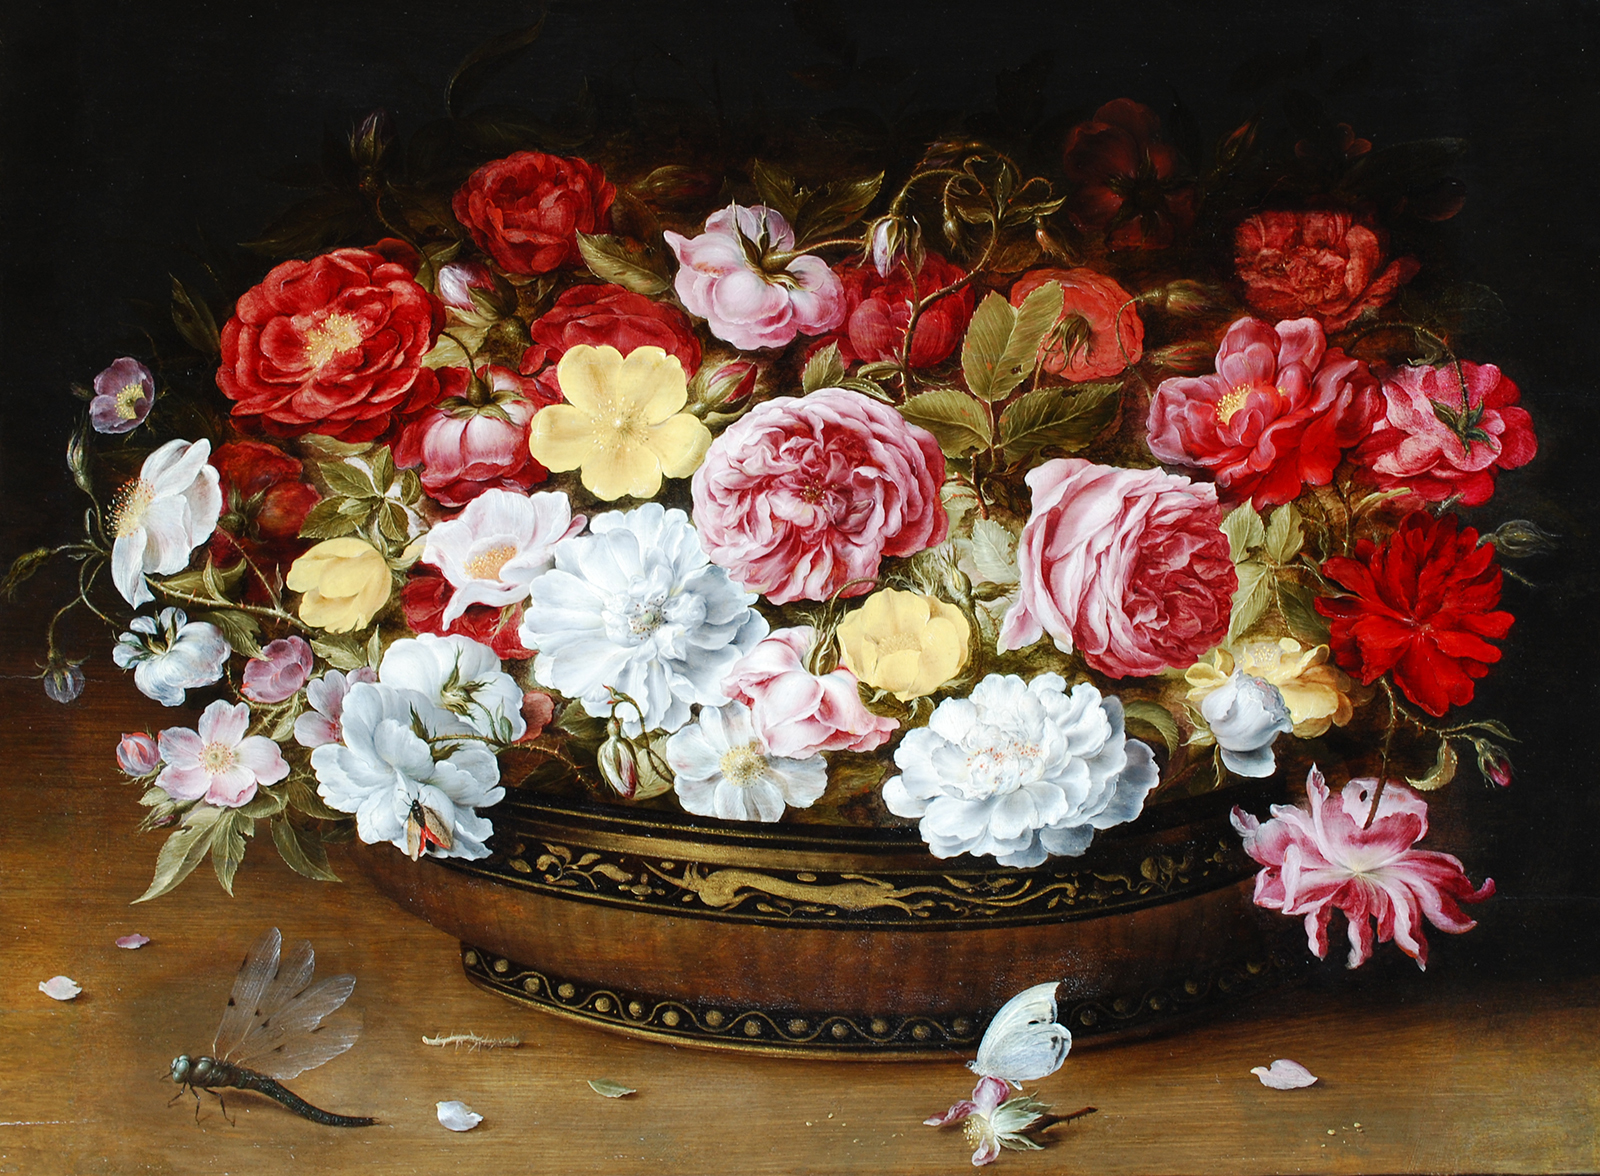
Osias Beert (Flemish, 1580-1624), Still Life of roses in a lacquer and canework oriental bowl with a butterfly and dragonfly all upon a ledge, Oil on oak panel, Grasset Collection
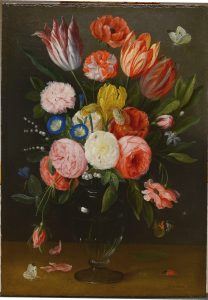
Jan van Kessel (Flemish, 1626-1679), Tulips, peonies, carnations, roses, convolvulus and other flowers in a glass vase on a ledge, Oil on canvas, Grasset Collection
YOuth activities funded in part by: